Category: Python

  • Understanding Python Attributes in Programming

    Understanding Python Attributes in Programming

    In the world of programming, Python stands out for its simplicity and versatility. A fundamental aspect of Python programming is understanding its attributes, which play a crucial role in object-oriented programming. Attributes in Python are essentially variables that belong to an object or class, and they hold data related to the object or class. This article delves into what Python attributes are, their types, and how to use them effectively in programming.

    What Are Python Attributes?

    Python attributes are characteristics or properties associated with Python objects. They are defined within classes and are accessed using the dot (.) notation. Attributes can store data that belongs to an instance of a class, and they help in defining the state or quality of that instance. In essence, attributes facilitate the creation of objects with specific traits.

    Types of Python Attributes

    Python attributes can be broadly categorized into two types: instance attributes and class attributes.

    • Instance Attributes: These are variables that are specific to an instance of a class. Each object or instance created from a class has its own separate set of instance attributes. For example, if you have a class Car, each object of this class can have its own color and model instance attributes.
    • Class Attributes: These are variables that are shared across all instances of a class. Class attributes are defined within a class but outside any instance methods. They are useful for storing constants or default values that apply to all instances. For instance, if all cars have four wheels, a class attribute named wheels with a value of 4 can be used.

    How to Use Python Attributes Effectively

    Effectively using Python attributes involves understanding their scope and lifetime. Here are some best practices for leveraging Python attributes in your programming:

    • Initialization: Always initialize instance attributes within the __init__ method. This ensures each object starts with a clean state or specific default values.
    • Encapsulation: To protect the integrity of data, consider using private attributes. In Python, prefixing an attribute name with an underscore (e.g., _attribute) is a convention to indicate that it should be treated as non-public.
    • Access and Modification: Use getter and setter methods to access and modify private attributes. These methods provide a layer of abstraction and flexibility to change the internal implementation without affecting external code.
    • Consistency: Maintain consistency between class and instance attributes. If a value needs to be shared among all instances, use a class attribute. Otherwise, rely on instance attributes for unique object properties.

    Understanding and effectively using Python attributes can significantly enhance your programming skills. By distinguishing between instance and class attributes, and applying best practices for their use, you can write more efficient and organized code. Attributes not only define the properties of objects but also contribute to the structural integrity and functionality of your programs.
  • Understanding the Zen of Python

    Understanding the Zen of Python

    The Zen of Python is a collection of aphorisms that encapsulate the philosophy of Python programming. Created by Tim Peters, these 19 guiding principles provide insights into writing clean, efficient, and readable code. While not enforced by the Python language itself, the Zen of Python serves as a cultural cornerstone for developers seeking to embrace Python’s minimalist and pragmatic nature.

    What is the Zen of Python?

    The Zen of Python is a list of aphorisms included as part of Python’s standard library. You can access it directly in Python by typing import this in the interpreter. Tim Peters crafted these aphorisms to capture the essence of Python’s design philosophy. Key principles include simplicity, readability, and the idea that “There should be one—and preferably only one—obvious way to do it.” Each aphorism stands as a succinct piece of wisdom, encouraging developers to write code that is straightforward and maintainable.

    Why are the Zen of Python Principles Important?

    Adhering to the Zen of Python is crucial for several reasons. Firstly, these principles promote consistency across Python codebases, making it easier for developers to read and understand each other’s code. This shared understanding reduces cognitive load and improves collaboration. Furthermore, by emphasizing simplicity and clarity, the Zen of Python helps prevent over-engineering and encourages solutions that are both efficient and easy to maintain.

    These principles also align with Python’s core philosophy of being an accessible language for beginners while remaining powerful for advanced users. By following the Zen of Python, developers contribute to a culture of code elegance and efficiency, which in turn enhances the language’s reputation and longevity as a tool for various applications, from data science to web development.

    How to Apply the Zen of Python in Your Code

    Implementing the Zen of Python requires internalizing its principles and reflecting them in your coding practices. Here are some practical steps:

    • Embrace simplicity: Opt for straightforward solutions over complex ones. Aim to write code that is easy for others to understand and modify.
    • Prioritize readability: Write clear and concise code. Use meaningful variable names and comments to enhance comprehension.
    • Choose one obvious way: When faced with multiple approaches, select the one that is most intuitive and aligns with established Python conventions.
    • Refactor regularly: Continuously improve your code by refactoring it to be more aligned with the Zen principles. This involves reducing redundancy and enhancing clarity.
    • Seek community feedback: Engage with other Python developers to review your code. Feedback can provide insights into how well your code adheres to the Zen of Python.

    Applying the Zen of Python is a dynamic process. As you gain experience, your interpretation and implementation of these aphorisms will evolve. By consistently reflecting on these principles, you can develop skills that not only improve your coding abilities but also contribute positively to the broader Python community. The Zen of Python is not just about writing code; it’s about fostering a mindset that prioritizes maintenance, collaboration, and elegance.

  • Comprehensive Guide to Python Tutorial PDFs

    Comprehensive Guide to Python Tutorial PDFs

    In the realm of programming, Python stands as a versatile and widely-used language due to its simplicity and readability. Whether you are a beginner or seeking to broaden your skill set, Python tutorial PDFs offer a structured and convenient way to learn. These PDFs can guide you from understanding basic concepts to mastering more advanced topics. This article explores the essential aspects of Python tutorial PDFs, how to use them effectively, and where to find reliable resources.

    What Are Python Tutorial PDFs?

    Python tutorial PDFs are downloadable documents that provide comprehensive instructions and exercises on Python programming. These PDFs cover a range of topics, from fundamental Python basics to more complex subjects, offering a flexible format for self-paced learning. They are particularly valuable for beginners seeking to understand Python’s syntax, variables, data types, and control flow structures. Additionally, tutorial PDFs often include examples and practice problems, promoting hands-on experience.

    How to Use Python Basics PDFs Effectively

    To maximize learning from Python basics PDFs, it’s important to follow a strategic approach. Begin by setting clear goals for your learning journey, such as mastering specific Python concepts or building a particular project. As you progress through the PDF, ensure you understand each section before moving on. Take notes and highlight key points to reinforce your memory.

    Practice regularly by attempting the exercises included in the PDF. This will help solidify your understanding and improve your coding skills. If you encounter challenges, seek additional resources or community forums for clarification. Remember, consistency is key; allocate regular time slots for studying to build a routine.

    Where Can You Find Reliable Python PDFs?

    Finding reliable Python PDFs is crucial to your learning success. Numerous educational platforms and websites offer high-quality PDFs for download. Websites such as Python.org, GitHub, and academic institutions provide a wealth of resources covering various aspects of Python programming.

    Moreover, online learning platforms like Coursera, Udemy, and edX often include downloadable PDF materials as part of their courses. These platforms are reputable sources, offering content created by experienced educators and industry professionals. Ensure to verify the credibility of the source and look for PDFs that have been well-reviewed by other learners.

    In conclusion, utilizing Python tutorial PDFs can greatly enhance your programming skills. By understanding what these PDFs offer and how to use them effectively, you can embark on a successful Python learning journey. With numerous reliable resources available, gaining proficiency in Python is well within reach.

  • How to Create Your Own Discord Bot Using Python

    How to Create Your Own Discord Bot Using Python

    Creating your own Discord bot can be an exciting venture, especially for those keen on exploring the intersection of gaming and technology. By following a structured approach, you can make your own Discord bot using Python, one of the most popular programming languages. This guide will walk you through the essential steps to set up, code, and deploy your bot effectively.

    Getting Started with Discord Bot Development

    Before diving into coding, it’s important to understand what you’ll need for Discord bot development. A Discord account is essential, as you’ll need to create and manage your bot through the platform. Additionally, some familiarity with Python is beneficial, as it will be the primary language we’ll use. Finally, installing the Discord.py library, a popular Python wrapper, will facilitate your bot’s interaction with the Discord API.

    Setting Up Your Development Environment

    Setting up your development environment is the first practical step. Begin by installing Python, if you haven’t already. It’s available for all major operating systems and can be downloaded from the official Python website. After installing Python, use the package manager pip to install the Discord.py library by executing the command pip install discord.py in your command prompt or terminal.

    Next, create a new project directory on your local machine where you will store your bot’s files. Within this directory, create a file named bot.py, which will contain your bot’s code. Ensure that you have a good text editor or an integrated development environment (IDE) set up for coding; options like Visual Studio Code or PyCharm are popular choices among developers.

    Coding Your Discord Bot in Python

    With the environment set up, you can now start coding your Discord bot. Open the bot.py file and begin by importing the necessary libraries:

    import discord
    from discord.ext import commands
    

    Create an instance of a bot using the following code:

    bot = commands.Bot(command_prefix='!')

    The command_prefix is what users will type to invoke your bot’s commands. In this example, it’s set to !.

    Next, define a simple command that responds to a user:

    @bot.command()
    async def greet(ctx):
        await ctx.send('Hello! I am your friendly Discord bot!')
    

    This simple command listens for the !greet command and responds with a friendly message.

    Finally, to run your bot, use:

    bot.run('YOUR_BOT_TOKEN')

    Replace YOUR_BOT_TOKEN with the actual token for your Discord bot, which you can obtain by creating an application on the Discord Developer Portal and generating a bot user.

    Deploying and Testing Your Discord Bot

    Deployment and testing are crucial to ensure your bot functions correctly. First, invite your bot to a Discord server where you have administrative privileges. This can be done by generating an OAuth2 URL from the Discord Developer Portal and selecting the appropriate permissions for your bot.

    Run your bot.py script using a terminal or command prompt. Once your bot is online, test its functionality by typing the !greet command in your Discord server’s chat. If everything is set up correctly, the bot should respond with “Hello! I am your friendly Discord bot!”

    For any errors or issues during testing, check the terminal output for debugging information. Common issues may involve incorrect token usage, missing permissions, or syntax errors in your code.

    With these steps, you have successfully learned how to create your own Discord bot. Constant updates and improvements can be made to your bot by adding more commands or integrating APIs to expand its functionality. As you become more comfortable with Discord API and Python, the possibilities for your bot are endless.

  • How to Fix ‘No Module Named pip’ in Python

    How to Fix ‘No Module Named pip’ in Python

    Encountering the “No Module Named pip” error in Python can be frustrating, especially if you’re setting up a new Python environment or trying to run a project for the first time. This error usually indicates that pip, the package installer for Python, isn’t available. Fortunately, this is a common issue with straightforward solutions. This guide provides steps to resolve this error and ensure your Python environment is functioning properly.

    What Causes the ‘No Module Named pip’ Error?

    The “No Module Named pip” error generally occurs when Python cannot locate the pip module. This can happen for several reasons. The most common cause is that pip was not installed with your Python distribution. Some Python installations, particularly on Linux systems, might not include pip by default. Another reason could be an incorrect PATH variable, which prevents the system from locating pip. Additionally, if multiple Python versions are installed, pip might exist in one version’s directory but not another’s, causing confusion when running pip commands.

    How to Install pip for Python

    To resolve the error, you need to install pip. Here are the steps to do so:

    1. First, download the get-pip.py script by visiting the official pip installation page or using the following command in your terminal or command prompt:
      curl https://bootstrap.pypa.io/get-pip.py -o get-pip.py
    2. Navigate to the location of the downloaded get-pip.py file using the command line.
    3. Run the script with the Python interpreter. Use the command:
      python get-pip.py or python3 get-pip.py depending on your system configuration.

    Upon successful execution, pip should be installed. It’s advisable to check the installation by typing pip --version to ensure everything is set up correctly.

    Troubleshooting Common pip Installation Issues

    If you encounter issues while installing pip, consider the following troubleshooting tips:

    • Check Python Installation: Ensure Python is properly installed by running python --version or python3 --version.
    • Verify PATH Configuration: Make sure the Python and Scripts directories are included in your system’s PATH environment variable. This allows the command line to find the pip executable.
    • Use the Correct Python Version: If multiple Python versions are installed, specify the version by using commands like py -3 get-pip.py for Python 3.
    • Administrative Privileges: Sometimes, installing pip requires administrator rights. Try running the Command Prompt or terminal as an administrator if you encounter permission errors.

    Verifying pip Installation in Python

    Once pip is installed, verifying the installation ensures everything is correctly configured. This can be done by executing the following command: pip --version. This command displays the installed pip version and its path, confirming successful installation. Additionally, you can try installing a simple package like requests to validate functionality: pip install requests. If the package installs without issues, your pip setup is working as expected.

    By following these instructions, you should be able to resolve the “No Module Named pip” error, ensuring a smoothly functioning Python environment. With pip operational, managing and installing Python packages becomes a hassle-free task, paving the way for efficient development workflows.

  • Best Python Certification Programs

    Best Python Certification Programs

    In the ever-evolving world of programming, obtaining the best Python certification can significantly enhance your career prospects. With a plethora of Python certificate programs available, choosing the right one can be daunting. This guide delves into the top Python certification programs, why a Python certificate is beneficial, how to choose the right program, and the key advantages of becoming certified.

    What are the Top Python Certification Programs?

    Several leading organizations offer Python certification programs that are well-regarded in the industry. Here are some of the top choices:

    • Python Institute’s PCAP and PCPP Certifications: The Python Institute offers two main certifications: the PCAP (Certified Associate in Python Programming) and the PCPP (Certified Professional in Python Programming). The PCAP certification is ideal for beginners, focusing on fundamental concepts. The PCPP certification is more advanced, covering topics like design patterns and databases.
    • Microsoft’s Python Certification: Microsoft’s Exam 98-381, “Introduction to Programming Using Python,” is a solid choice for those seeking an entry-level certification. It covers core Python concepts and is recognized globally.
    • Coursera’s Python for Everybody Specialization: Offered by the University of Michigan, this specialization is popular for its comprehensive curriculum, covering everything from basics to data structures and databases.
    • edX’s Professional Certificate in Python for Data Science: This program, in collaboration with IBM, focuses on Python’s applications in data science, making it perfect for those aiming to enter this field.

    Why Should You Pursue a Python Certificate?

    A Python certificate validates your programming skills and can significantly impact your career progression. Employers often look for certified professionals, as it demonstrates a commitment to mastering the language. Moreover, it opens up opportunities in various domains, such as data science, machine learning, web development, and automation.

    How to Choose the Right Python Certification for You

    Choosing the right Python certification depends on several criteria:

    • Skill Level: Assess your current proficiency in Python. Beginners might opt for entry-level certifications like Microsoft’s Exam 98-381 or the Python Institute’s PCAP.
    • Career Goals: If your goal is to specialize in data science, consider programs like edX’s Professional Certificate in Python for Data Science. For software development, the PCPP certification is more suitable.
    • Program Format: Decide whether you prefer self-paced online courses or structured, instructor-led programs. Platforms like Coursera and edX offer flexible learning options.
    • Budget: Consider the cost of the certification. Some programs offer financial aid or free trials, which can be beneficial if you’re budget-conscious.

    What Are the Key Benefits of Python Certification?

    Obtaining a Python certification offers numerous benefits:

    • Industry Recognition: Certifications from reputable organizations like the Python Institute and Microsoft are widely recognized and respected.
    • Career Advancement: Certified professionals often have a competitive edge in the job market, leading to better job prospects and potential salary increases.
    • Skill Enhancement: Certification programs not only test your existing knowledge but also push you to learn and master new topics, enhancing your overall programming skills.
    • Networking Opportunities: Joining a certification program connects you with a community of like-minded professionals, providing valuable networking opportunities.

    In conclusion, earning a Python certificate is a strategic step towards advancing your programming career. By selecting the right certification program that aligns with your skills and career goals, you can unlock numerous opportunities in the tech industry.

  • Understanding the ‘for’ Loop in Python

    Understanding the ‘for’ Loop in Python

    A ‘for’ loop is a fundamental control structure in Python that allows you to iterate over a sequence, such as a list, tuple, string, or range. It enables you to execute a block of code multiple times, efficiently handling repetitive tasks. Mastering ‘for’ loops can significantly enhance your coding skills, streamline your programming process, and simplify complex tasks.

    What Is a ‘for’ Loop in Python?

    In Python, a ‘for’ loop is used to iterate over elements of a sequence. The loop goes through each element in the sequence, executing the block of code inside it for every element. The syntax of a ‘for’ loop starts with the keyword for, followed by a temporary variable name, the keyword in, and the sequence to iterate over. Here’s a basic example:

    for element in sequence:
        # code to execute

    This loop will continue until it has processed each item in the sequence. The temporary variable element assumes the value of each item in the sequence on each iteration, allowing the code block to use or manipulate these values as needed.

    How to Create a ‘for’ Loop in Python

    Creating a ‘for’ loop in Python involves using the right syntax and understanding the flow of iteration. The first step is to identify the sequence you want to iterate over. Common sequences include lists, tuples, strings, or range objects. Here’s how you can create a simple ‘for’ loop:

    fruits = ["apple", "banana", "cherry"]
    for fruit in fruits:
        print(fruit)

    In the example above, the loop iterates over each item in the fruits list, printing each item. This is a straightforward implementation of how to make a loop in Python.

    Practical Examples of ‘for’ Loops

    ‘For’ loops can be applied in various practical scenarios, such as processing lists, reading files, and generating sequences. Here are some examples:

    • Calculating the sum of numbers: Use a ‘for’ loop to sum the numbers in a list.
    • numbers = [1, 2, 3, 4, 5]
      sum = 0
      for number in numbers:
          sum += number
      print("Total:", sum)
    • Reading lines from a file: Open a file and read each line using a ‘for’ loop.
    • with open('file.txt', 'r') as file:
          for line in file:
              print(line.strip())
    • Generating a sequence: Create a sequence of numbers using the range() function.
    • for i in range(5):
          print(i)

    These examples demonstrate how ‘for’ loops can be used to automate tasks, process data, and interact with external resources like files.

    Common Mistakes and How to Avoid Them

    While ‘for’ loops are powerful tools, they can lead to errors if not used correctly. Here are some common mistakes and tips on how to avoid them:

    • Incorrect loop variable: Ensure the loop variable is properly declared and used within the loop.
    • Modifying the sequence during iteration: Avoid changing the sequence while iterating over it, as this can lead to unpredictable behavior.
    • Confusing ‘for’ loop with ‘while’ loop: Remember that ‘for’ loops iterate over sequences, while ‘while’ loops continue until a condition is false.
    • Using incorrect range values: Verify that the range values are set correctly to avoid unnecessary iterations.

    By understanding these pitfalls and applying best practices, you can harness the full potential of Python ‘for’ loops in your projects.

  • Understanding Python Lambda Functions

    Understanding Python Lambda Functions

    Python lambda functions are a powerful feature that allows you to create small, anonymous functions on the fly. These functions are particularly useful when you need a short-term solution or a quick way to apply a function without formally defining it using the def keyword. Understanding the usage and syntax of lambda functions can enhance your efficiency and flexibility in Python programming.

    What Are Python Lambda Functions?

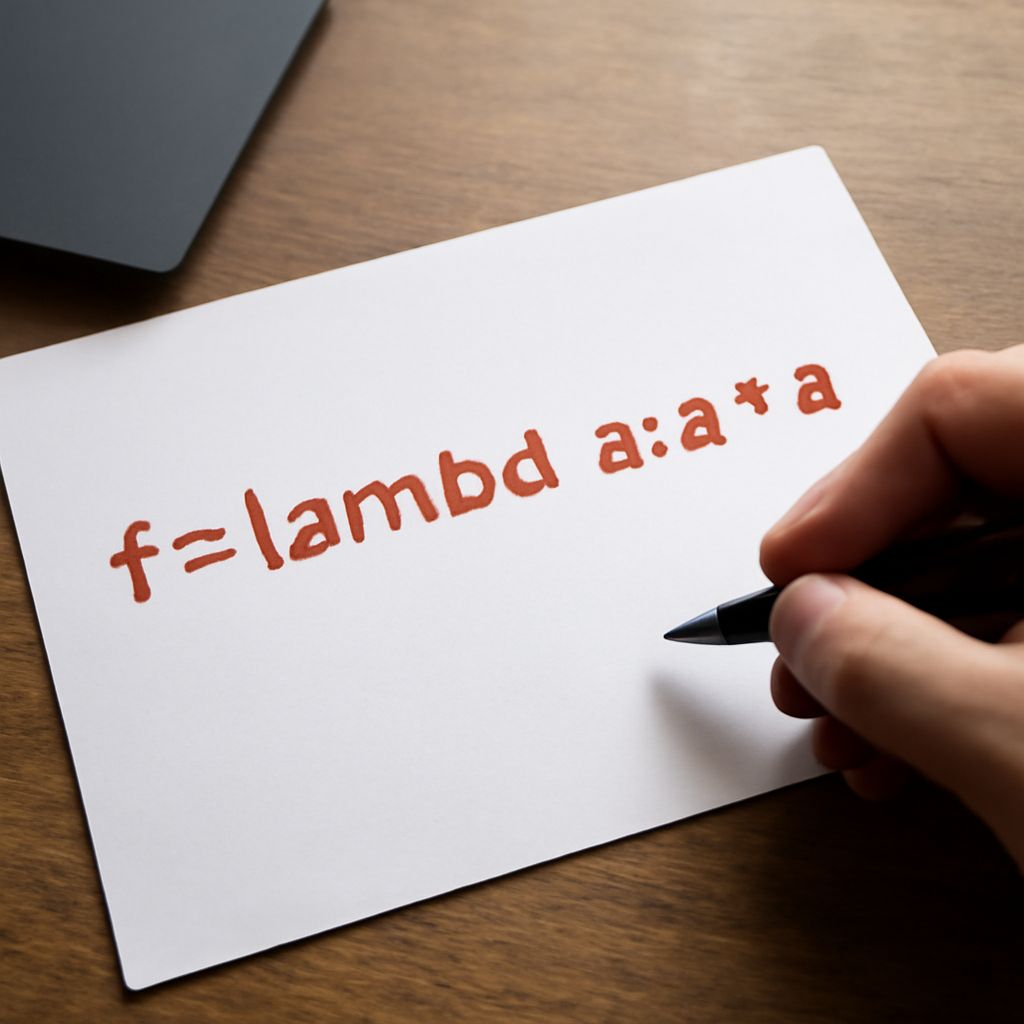
    In Python, a lambda function is a small anonymous function defined with the keyword lambda. These functions can have any number of input parameters but must consist of a single expression. The value of the expression is returned when the lambda function is invoked. Unlike standard functions defined with def, lambda functions are intended for simple operations and are often used in places where functions are required temporarily.

    An example of a simple lambda function that adds two numbers is:

    add = lambda x, y: x + y
    print(add(3, 5))  # Output: 8
    

    This lambda function takes two arguments, x and y, and returns their sum.

    How to Use Lambda in Python

    Lambda functions are commonly used in conjunction with functions like map(), filter(), and reduce(), which expect a function object as an argument. They are also used when you need a simple function for a short period and prefer not to formally define it.

    • Using with map(): The map() function applies a given function to all items in an iterable. Here’s how you can use a lambda function with map():
    numbers = [1, 2, 3, 4]
    squared = map(lambda x: x * x, numbers)
    print(list(squared))  # Output: [1, 4, 9, 16]
    
    • Using with filter(): The filter() function creates a list of elements for which a function returns true. A lambda function can be used to specify the condition.
    even_numbers = filter(lambda x: x % 2 == 0, numbers)
    print(list(even_numbers))  # Output: [2, 4]
    
    • Using with reduce(): The reduce() function, from the functools module, applies a rolling computation to sequential pairs of values in a list. Here’s an example:
    from functools import reduce
    product = reduce(lambda x, y: x * y, numbers)
    print(product)  # Output: 24
    

    Understanding Python Lambda Syntax

    The Python lambda syntax is quite straightforward. It is defined using the lambda keyword followed by a list of arguments, a colon, and the expression to be evaluated. The basic syntax looks like this:

    lambda arguments: expression
    

    Here are a few important points to keep in mind:

    • No Name: Lambda functions are anonymous, meaning they do not have a name. While they can be assigned to variables, the function itself has no intrinsic name.
    • Single Expression: Lambda functions are limited to a single expression. They cannot contain multiple expressions or commands.
    • Return Value: The result of the single expression is automatically returned when the lambda function is called.

    For example, consider a lambda function that multiplies its input by two:

    double = lambda x: x * 2
    print(double(5))  # Output: 10
    

    Understanding and using Python lambda functions can provide a concise way to work with functions, particularly in scenarios where you need quick and temporary solutions.

  • How to Exit a Python Script: Graceful Ways to Stop It

    How to Exit a Python Script: Graceful Ways to Stop It

    To exit Python script execution, choose the least forceful option that matches the situation. Let the script reach the end for normal completion, use return or break for local control flow, and use sys.exit() when the whole process must report a deliberate status. Reserve subprocess termination for a separate process that cannot finish cooperatively.

    These choices are not interchangeable: returning from a function does not stop the interpreter, while killing a process does not provide normal function cleanup.

    How do you exit a Python script normally?

    A Python script exits normally when its top-level code reaches the end. The interpreter then closes, and the operating system usually receives exit code 0. This is the cleanest way to close a Python program after all required work succeeds.

    Put reusable work in a function and return from that function when its job is complete. A return value goes to the caller; it does not automatically exit the entire script. At the top level, reaching the end is equivalent to completing normally, but a top-level return is not valid Python syntax.

    Use a context manager for resources that need predictable cleanup. For example, with open(“output.txt”, “w”) as file: closes the file when the block ends, including when an exception interrupts it. For custom cleanup, place it in a finally block:

    try: perform_work()
    finally: release_resource()

    How do sys.exit() and SystemExit set exit codes while cleanup runs?

    Call sys.exit() when a function needs to stop the whole interpreter intentionally. It raises the SystemExit exception, allowing Python to run active finally blocks and context-manager cleanup while unwinding the stack.

    sys.exit(0) indicates success. A nonzero integer, such as sys.exit(2), signals an error or another meaningful failure state to the shell, scheduler, or calling process. Passing a string prints that message and normally produces a nonzero exit status.

    SystemExit is an exception, but it inherits directly from BaseException rather than Exception. Code that catches SystemExit explicitly can prevent the process from ending, so only intercept it when an embedding application genuinely needs that behavior. Cleanup still belongs in finally or a context manager, not after a call that may exit.

    How do return, break, Ctrl+C, and KeyboardInterrupt affect how you close a Python program?

    • return leaves the current function and gives a value to its caller. It does not terminate the script unless the caller uses that result to end execution.
    • break leaves the nearest loop only. Execution continues with the first statement after that loop.
    • Ctrl+C sends an interrupt from the terminal. Python normally represents it as KeyboardInterrupt in the main thread.
    • KeyboardInterrupt can be handled to log a message, save state, or perform an orderly shutdown. Without a handler, Python stops with an interrupt traceback and a nonzero status.

    Handle interruption around the operation that needs protection: try the work, except KeyboardInterrupt to choose a response, and use finally for cleanup. Do not use break when an exception or process-wide exit is required.

    How do you terminate or kill a subprocess, and when might you kill a Python program?

    For a child process created with subprocess.Popen, call process.terminate() first. It requests termination and may allow the child to handle the signal and release resources. Then call process.wait() and inspect process.returncode to verify the final state.

    If the child ignores termination or exceeds a shutdown timeout, call process.kill(), then call wait() again. On Unix-like systems, terminate commonly sends SIGTERM and kill sends SIGKILL; platform behavior differs, but kill is the forceful option. It can prevent application-level cleanup.

    Use kill a Python program only when cooperative shutdown has failed or the process is unsafe or irreparably stuck. A parent process can check process.poll() before and after termination: None means the child is still running, while a numeric return code confirms that it has exited.

  • Python file existence: check paths with pathlib and os.path

    Python file existence: check paths with pathlib and os.path

    A Python file exists check is easiest with pathlib. To check if file exists in Python, create a Path object and call exists(). This works with both relative and absolute paths.

    Use a pre-check when you need to choose a response for a missing path. When you immediately need to open the file, catch FileNotFoundError as well, because a path can change after the check.

    Python file existence: check a path with pathlib

    Import Path, then call exists() on the path you want to test:

    from pathlib import Path

    relative_path = Path(“reports/today.txt”)

    absolute_path = Path(“/var/data/reports/today.txt”)

    if relative_path.exists():

        print(“The path exists”)

    Path(“reports/today.txt”) is a relative path. Python resolves it against the process’s current working directory, which may differ from the directory containing your script. Use Path.cwd() to see that directory:

    print(Path.cwd())

    An absolute path identifies its location from the filesystem root, such as /var/data/reports/today.txt on Linux and macOS. Windows paths can use a raw string such as Path(r”C:\data\reports\today.txt”).

    How do you distinguish files and directories?

    exists() returns True for both files and directories. Use is_file() when the path must identify a regular file, and is_dir() when it must identify a directory:

    path = Path(“reports/today.txt”)

    if path.is_file():

        print(“A file is available”)

    elif path.is_dir():

        print(“A directory is available”)

    else:

        print(“The path is missing”)

    For a missing path, all three methods return False. A directory makes exists() and is_dir() true, but is_file() false. A file produces the opposite file-versus-directory result.

    What are the os.path equivalents?

    The older os.path functions provide the same basic tests and accept string paths:

    import os

    path = “reports/today.txt”

    os.path.exists(path)

    os.path.isfile(path)

    os.path.isdir(path)

    Use os.path.exists() for either type, os.path.isfile() for a file, and os.path.isdir() for a directory. os.path.abspath(path) converts a relative path to an absolute string. For new code, pathlib usually keeps path construction and file operations more readable.

    What if a file disappears after the check?

    An existence check is not a guarantee that the path will still exist when you use it. Another process can delete, replace, or rename the file between exists() and open(). This check-then-use race can also occur if a directory in the path changes.

    For actual file access, open the path and handle the failure directly. This is how to check if a file exists while safely attempting to read it:

    try:

        with path.open(“r”, encoding=”utf-8″) as file:

            contents = file.read()

    except FileNotFoundError:

        contents = “”

    Use exists() for validation or user-facing messages, but rely on the exception when opening the file is the operation that matters.